
How Home Addition Projects Work: From Permit to Punch List
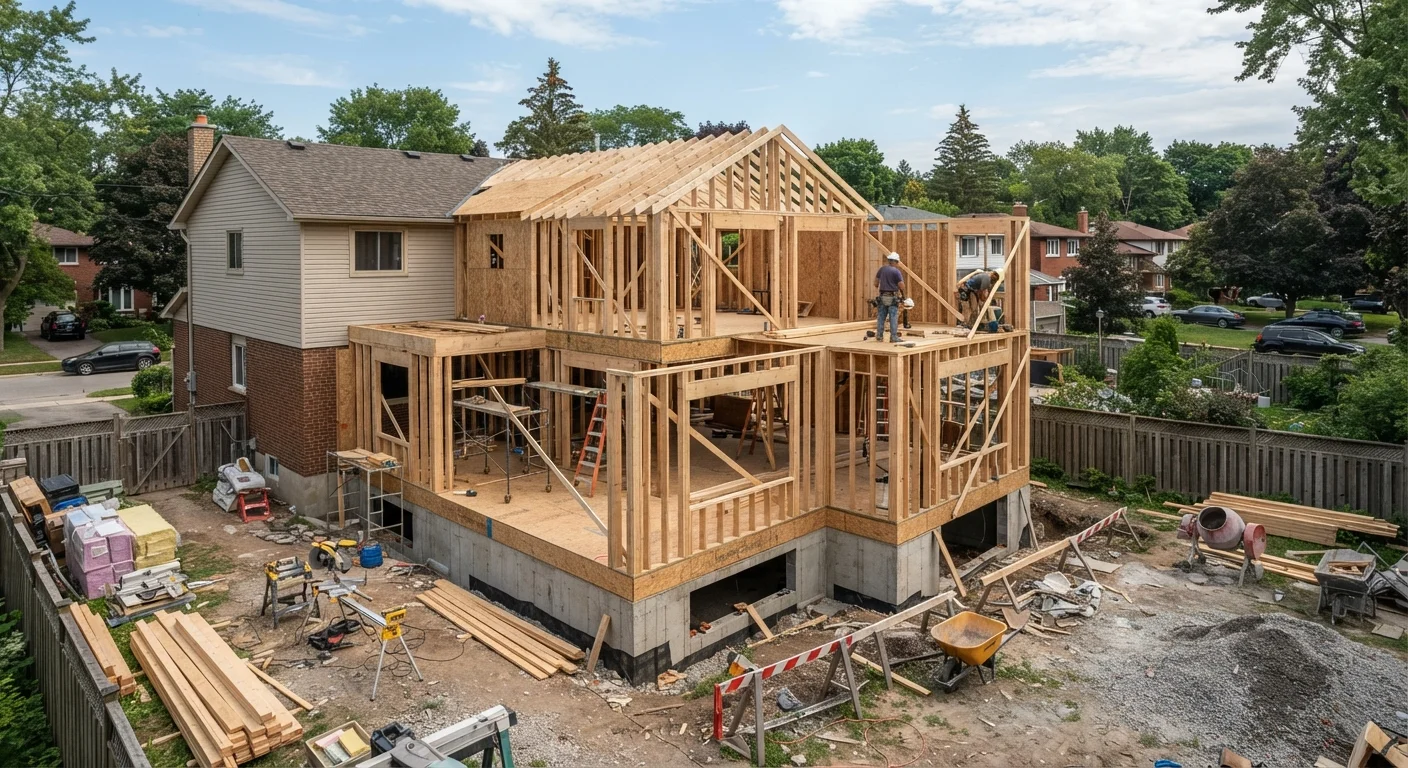
Photo credit: ArticlesHaven.net
In this article
Adding square footage is one of the most complex home projects. Here's what the full process looks like from planning to completion.
Key Takeaways
- Most home additions require building permits, which must be obtained before any construction begins.
- The process typically spans five distinct phases: planning, permitting, foundation, framing, and finishing.
- A general contractor usually coordinates subcontractors for electrical, plumbing, and HVAC work.
- Final inspections and a punch list are required before the space can be legally occupied.
- Budget overruns are common - industry guidance generally recommends a 15-20% contingency fund.
- Skipping permits can complicate home sales and may void homeowner's insurance coverage.
Why Home Additions Are in a Different Category Than Most Remodels
A home addition is not simply a large remodel - it's a construction project that adds permanent square footage to a structure, which puts it in a higher-risk, higher-complexity category than most interior projects. Unlike a kitchen remodel, which works within an existing footprint, an addition requires foundation work, new framing, and coordination with every major building system: electrical, plumbing, and HVAC.
That complexity makes thorough planning the most important investment you can make before a single permit application is filed. Homeowners who skip the planning phase - or underestimate what's involved - are the ones most likely to encounter cost overruns and schedule delays. The myths that derail renovation budgets often involve assumptions made before the design drawings exist.
What you will need
Before reviewing the step-by-step process, it's worth understanding the key players: a general contractor manages the day-to-day build and subcontractor coordination; an architect or designer produces the permitted drawings; and the local building department enforces code compliance through scheduled inspections at multiple stages.
Licensed General Contractor
Manages the overall construction process, coordinates subcontractors, and is typically responsible for pulling the main building permit.
Architect or Residential Designer
Produces stamped drawings required for permit applications and ensures the design meets structural and code requirements.
Local Building Department
Issues permits, schedules inspections, and enforces building code compliance throughout the project.
Structural Engineer
Required when the addition affects load-bearing walls or requires custom beam or foundation calculations.
Project Management Software or Binder
Tracks schedules, contractor communications, inspection results, and payment milestones in one place.
The Step-by-Step Process: Permit to Punch List
Most home additions follow a predictable sequence, even if the timeline varies by project size, contractor availability, and local permit review speed. Understanding the sequence helps you set realistic expectations, know when to ask questions, and recognize when something is out of order.
Never Skip the Permit Step
Building without a required permit is a serious legal and financial risk. Unpermitted additions can trigger fines, forced removal, and complications when selling your home. Some homeowner's insurance policies may deny claims tied to unpermitted work. Always confirm permit requirements with your local building department before breaking ground.
Define Scope and Hire Design Help
Start by clearly defining what you're building - square footage, intended use, number of stories, and how it connects to the existing structure. Vague scope is one of the leading causes of budget overruns. Once you have a concept, hire a licensed architect or residential designer to produce construction drawings. These drawings are required for permit applications in virtually every jurisdiction and form the legal basis for all contractor bids.
If the addition touches load-bearing walls or requires unusual foundation work, your designer will likely involve a structural engineer at this stage.
Verify Zoning and Apply for Permits
Before submitting a permit application, confirm that your design complies with local zoning rules - specifically setback requirements (how close you can build to property lines), maximum lot coverage, and height limits. Your local planning or zoning department handles this review separately from the building department in many municipalities.
Once zoning is confirmed, submit your permit application with the required drawings, site plan, and fees. Permit review timelines vary widely - from two weeks in smaller jurisdictions to several months in high-volume urban areas. Do not begin construction before the permit is issued and posted on site.
Complete Site Prep and Foundation Work
With permits in hand, the first physical phase is site preparation: staking the footprint, clearing vegetation, and excavating for the foundation. The type of foundation - slab, crawl space, or full basement - depends on your region's climate and soil conditions, as well as what the existing structure uses.
Foundation work typically triggers the first required inspection. The building inspector will visit to verify that footings and reinforcement meet code before concrete is poured. Do not cover any foundation work until it has passed inspection.
Frame the Structure and Rough-In Utilities
Framing defines the walls, floor system, and roof of the addition. Once the frame is complete, subcontractors move in to rough-in electrical wiring, plumbing supply and drain lines, and HVAC ductwork or equipment. This is the stage where all in-wall and in-ceiling systems are installed before any drywall goes up.
Rough-in inspections are required for each trade before walls are closed. Electrical, plumbing, and mechanical inspectors each make a separate visit. All three must pass before drywall can begin. This sequencing often feels slow but is non-negotiable.
Insulate, Drywall, and Finish Interiors
After rough-in inspections pass, insulation is installed and then inspected in many jurisdictions before drywall is hung. Once drywall is up, the finish phase begins: taping, mudding, painting, flooring, trim carpentry, cabinets if applicable, and fixture installation. This phase takes time relative to what's visible - drywall mud requires multiple coats and drying time between each.
Finish work is also where many homeowners choose to take on limited DIY tasks, such as painting or installing hardware. For guidance on which tasks are appropriate for DIY versus professional work, see when to hire a contractor versus doing it yourself.
Pass Final Inspection and Complete the Punch List
Once construction is substantially complete, the building department conducts a final inspection covering all systems and structural elements. If the addition includes habitable space, a certificate of occupancy is typically issued upon passing. This document is legally significant - it confirms the space meets code and can be occupied.
Simultaneously, walk through the space with your contractor to create a punch list: a documented list of incomplete or deficient items that must be resolved before final payment is released. Common punch list items include paint touch-ups, hardware that wasn't installed, gaps in trim, and fixture adjustments. Keep final payment tied to punch list completion, not to move-in.
Get the Punch List in Writing Early
Ask your contractor to define punch list expectations before construction starts, not at the end. Knowing upfront what 'complete' looks like - including paint touch-ups, hardware installation, and cleanup - reduces end-of-project disputes and keeps the final payment process clean.
Structural and Utility Work Requires Licensed Trades
Electrical, plumbing, gas, and load-bearing structural work in a home addition must be performed by licensed professionals in most jurisdictions. Attempting this work yourself without the proper license can result in failed inspections, required demolition, or safety hazards. Verify what your local codes require before assigning any task to a DIYer.
If you're comparing a full addition to other ways of gaining square footage, it's useful to read how a basement finishing project or a garage conversion differs - those alternatives carry their own permit and zoning requirements but typically involve less structural complexity than a ground-up addition.
This article is for general informational purposes only. Building codes, permit requirements, and contractor licensing rules vary by location. Always verify requirements with your local building and planning departments and consult licensed professionals before beginning any construction project.

Author
Articles Haven Editorial Contributor
Articles Haven Editorial Team is the collective byline for our editorial team and contributor network. Articles published under this byline or an editorial pen name are researched, written, and reviewed according to our editorial standards for clarity, consistency, and independence before publication.
View all articles →