
Seed Starting Indoors: Timing, Containers, and What Can Go Wrong
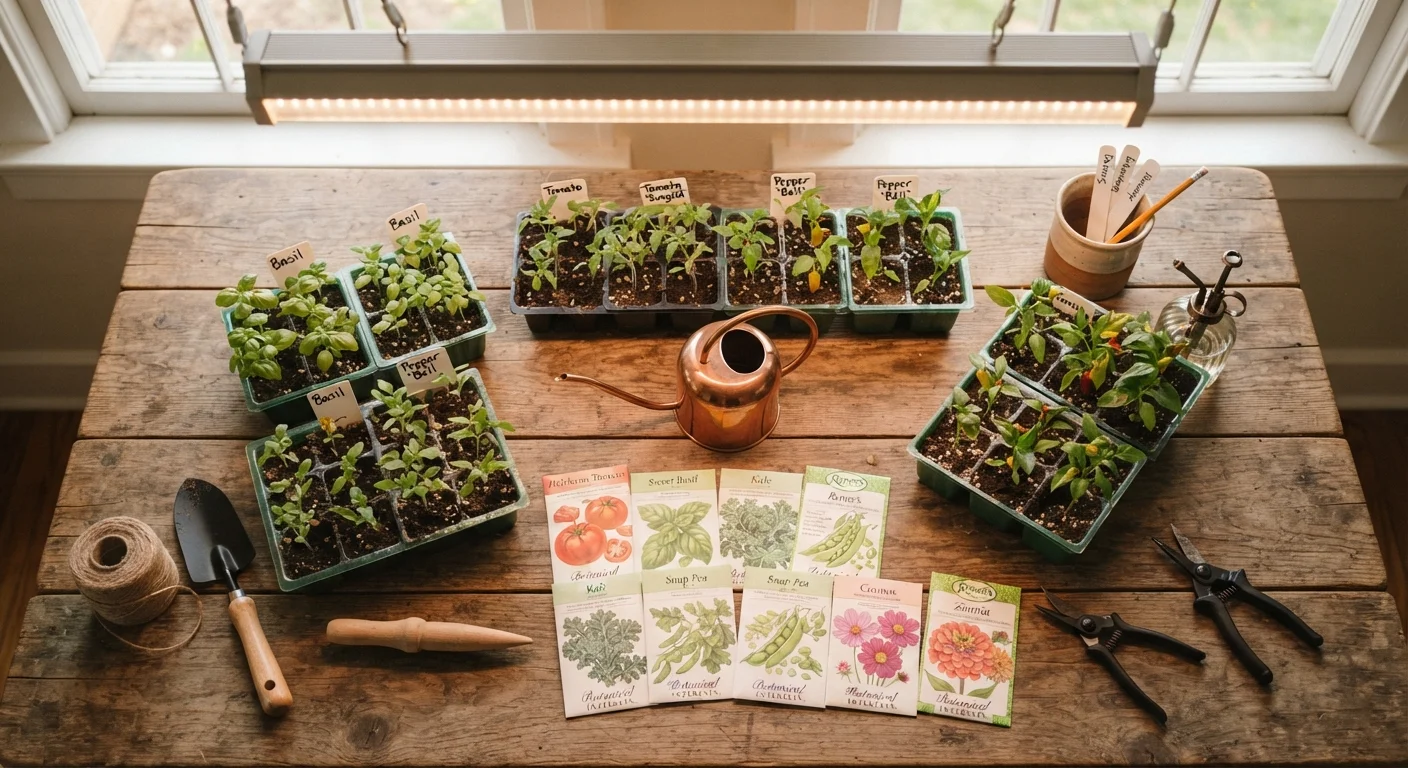
Photo credit: ArticlesHaven.net
In this article
Starting seeds indoors extends your growing season, but timing and setup matter. A practical walkthrough for beginners and returnees alike.
Key Takeaways
- Start seeds indoors 6-8 weeks before your area's average last frost date.
- Seed-starting mix is not interchangeable with regular potting soil - use the right medium.
- Leggy, pale seedlings usually signal insufficient light, not poor seeds.
- Hardening off seedlings before outdoor transplanting is a non-negotiable step.
- Overwatering is the leading cause of seedling failure at the indoor stage.
Why Indoor Seed Starting Is Worth the Setup
Growing from seed indoors lets you access a much wider range of varieties than what's available as transplants at local garden centers. It also extends your effective growing season in climates with short summers, and it's considerably less expensive per plant than buying starts.
The tradeoff is that it requires consistent attention during a 6-10 week window, appropriate equipment, and a willingness to troubleshoot. The most common reason gardeners give up on indoor starting after one attempt is a setup problem - not a plant problem. Getting the fundamentals right from the start changes that outcome significantly.
If you're also interested in making the most of limited outdoor space once transplants are ready, the principles in our container gardening guide pair well with what you'll be producing indoors.
What you will need
Seed-starting trays or cell packs
Provide individual compartments for each seed, making transplanting easier and reducing root disturbance.
Seed-starting mix
A fine, sterile, low-nutrient medium that drains well and supports germination without damping-off fungi.
Humidity dome or plastic wrap
Traps moisture around seeds during germination, reducing the need for frequent watering.
Grow light (full-spectrum LED or fluorescent)
Supplements or replaces natural light to prevent leggy, weak seedlings when window light is insufficient.
Heat mat (seedling heat mat)
Warms the soil from below to speed germination for warm-season crops like tomatoes and peppers.
Plant labels and permanent marker
Keeps track of what's planted where - trays of seedlings look identical until they're much larger.
Step-by-Step: Starting Seeds Indoors
Follow these steps in order. Each builds on the previous, and skipping ahead - especially the hardening-off step - is a common source of transplant failure.
Calculate your sowing dates
Look up your average last frost date, then count backward by the number of weeks listed on each seed packet - typically 6 to 8 weeks for most vegetables and annual flowers. Different crops have different lead times: tomatoes and peppers often need 8-10 weeks, while squash and cucumbers need only 3-4 weeks (and resent root disturbance if started much earlier).
Write the target sow date on your seed packets and create a simple calendar. Starting too early produces overgrown transplants that struggle at outdoor planting time; starting too late defeats the purpose of indoor sowing.
Prepare containers and growing medium
Fill your trays or cell packs with pre-moistened seed-starting mix. The mix should feel like a wrung-out sponge - damp but not dripping. Avoid regular garden soil or standard potting mix in seed trays; both can compact, hold too much moisture, and harbor pathogens that kill young seedlings.
If reusing containers from a previous season, wash them with a diluted bleach solution (1 part bleach to 9 parts water) and rinse thoroughly to eliminate disease carryover.
Sow seeds at the correct depth
The general rule: sow a seed at a depth equal to about twice its diameter. Very fine seeds (like basil or snapdragon) are sown at or just below the surface. Larger seeds like squash are pressed about half an inch deep. Refer to the seed packet - depth guidance is printed there for a reason.
Place one or two seeds per cell. Sowing multiple seeds gives you a backup if one doesn't germinate, but you'll thin to the strongest seedling later. Cover with a thin layer of mix and gently firm the surface.
Provide warmth and humidity during germination
Most seeds germinate best when the soil temperature is between 65°F and 75°F. If your home runs cool, a heat mat placed under the tray can raise soil temperature by 10-20°F above ambient, which meaningfully speeds germination for warm-season crops.
Place a humidity dome or loosely draped plastic wrap over the tray until you see sprouts. Remove it promptly once germination begins - leaving it on encourages damping-off, a fungal condition that collapses seedlings at the soil line.
Supply adequate light
This is where most indoor seed-starting setups fall short. A south-facing window with direct sun can work for some crops in spring, but many homes don't provide consistent or intense enough light. If seedlings are stretching toward the light and becoming tall and spindly (called 'legginess'), light is the problem - not the seeds or the soil.
A full-spectrum grow light positioned 2-4 inches above the seedling tops and run for 14-16 hours per day is a reliable fix. Raise the light as seedlings grow to maintain that gap.
Water carefully and consistently
Overwatering is the top killer of indoor seedlings. Water when the top of the mix begins to dry out - not on a rigid daily schedule. Bottom watering (pouring water into the tray below the cells and letting the mix wick it up) delivers moisture without disturbing the soil surface or promoting fungal problems from overhead wetting.
Use room-temperature water. Very cold tap water can shock seedlings and briefly slow growth.
Harden off seedlings before transplanting
Indoor-grown seedlings are soft - they've never experienced direct sun, wind, or temperature swings. Move them outdoors abruptly and many will sunscald, wilt severely, or stall in growth. Hardening off means gradually exposing them to outdoor conditions over 7-10 days.
Start with 1-2 hours of indirect outdoor light on day one, then increase sun exposure and duration each day. Bring trays in at night if temperatures will drop below the crop's tolerance. By the end of the period, seedlings can stay out overnight and handle a full day of sun.
Timing Errors Are Hard to Recover From
Starting too early is as problematic as starting too late. Seedlings that outgrow their containers before outdoor conditions are ready become root-bound and stressed, and they rarely catch up to properly timed transplants. Recalculate your sowing dates each season using your current frost date - don't rely on last year's schedule without checking.
Match the Crop to Indoor Starting
Not every vegetable benefits from indoor starting. Root crops like carrots and radishes dislike transplanting and should be direct-sown outdoors. Beans and corn also germinate so quickly that starting them indoors offers little advantage. Focus your indoor setup on crops with long lead times: tomatoes, peppers, eggplant, and slow-to-mature annual flowers like petunias and impatiens.
Damping-Off: The Silent Seedling Killer
Damping-off is a fungal condition that causes seedlings to collapse at the soil line, often overnight. It spreads quickly in humid, poorly ventilated conditions. Prevention is the only effective strategy - use sterile seed-starting mix, don't overwater, remove humidity domes promptly after germination, and provide airflow with a small fan if needed. Once damping-off appears in a tray, it's usually best to discard affected seedlings and start fresh.
Troubleshooting Common Problems
Even experienced gardeners run into issues. Here's how to read the signs:
- Leggy, tall seedlings: Not enough light. Move closer to a grow light or add supplemental lighting immediately. Leggy seedlings can sometimes be buried deeper at transplant time (tomatoes especially tolerate this), but prevention is far easier.
- No germination after two weeks: Check soil temperature - many seeds won't germinate in cold soil. Also verify seed viability: old seed loses germination rates, and some crops (onions, parsnips) decline quickly. Do a paper-towel germination test on a few seeds before sowing the full tray.
- Yellow lower leaves: Can indicate overwatering, poor drainage, or - in older seedlings - a need to begin light feeding with a diluted liquid fertilizer. Seed-starting mix contains little to no nutrients, so seedlings exhaust what's available within a few weeks.
- Wilting despite moist soil: Often a root problem. Check for damping-off at the soil line, or gently inspect roots for rotting. Reduce watering immediately.
For a broader look at how timing and environment affect plant health across your garden, our article on pruning timing mistakes illustrates how often calendar-based errors - not pest or disease - are the root cause of plant setbacks.

Author
Articles Haven Editorial Contributor
Articles Haven Editorial Team is the collective byline for our editorial team and contributor network. Articles published under this byline or an editorial pen name are researched, written, and reviewed according to our editorial standards for clarity, consistency, and independence before publication.
View all articles →